How to Apply Violin Finger Tape
🎯 What You’ll Learn
Playing in tune is one of the trickiest—and most rewarding—skills to build on the fiddle. This lesson teaches you how to apply finger tape as a helpful guide, especially if you’re learning on your own. You’ll go step-by-step through measuring, placing, and adjusting tape so it lines up with the correct finger spots.
Along the way, you’ll also learn how to pair tape with drone tracks for better ear training and confidence. The goal isn’t to rely on the tape forever—but to use it as a bridge toward strong muscle memory and pitch recognition.
🛠 Key Tips
-
Think of finger tape like training wheels—you’ll outgrow it soon.
-
Measure carefully from the nut: 36mm (1st finger), 68mm (2nd), 82mm (3rd).
-
Keep tape strips straight and parallel to the bridge.
-
Test each tape with a drone or tuner before pressing it down.
-
If tape peels off, try securing the ends with a bit of clear scotch tape.
-
Play with your eyes closed to start weaning off the visual cues.
❓ Common Questions
Do I really need finger tape?
Not necessarily—but it can be a big help early on, especially if you’re not working with a teacher.
What’s better—tape or ear training?
Your ear is the ultimate guide! Tape can help you get close, but drone practice is what really builds accuracy.
When should I take the tape off?
Once you start landing notes reliably, try playing without looking—or peel off one tape at a time to ease into it.
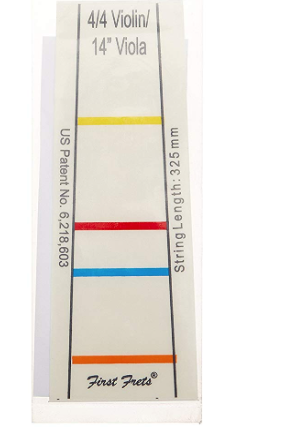
Don’t Fret Decal
Probably the easiest solution is to buy a Don’t Fret decal. This is a sticker you place on the fingerboard that indicates all the finger positions.
If you’re learning on your own, you might find it challenging to play the left-hand fingers in tune. Drone-tuning™ is the best way to learn and practice this FUNdamental skill. But you might still need some extra help. You can use the old-school solution of placing violin finger tape.
Finger tape on the violin neck is like training wheels on a bike 🚲. Eventually you’ll take them off and just ride.
It’s important to understand that the tape doesn’t mean you’ll automatically play perfectly in tune. Even if the tape is perfectly placed, you still have to use your ear. Just leaning your finger can push the note out of tune.
The tape gets you in the ballpark, but you still have to find your seat. ⚾️
The DIY approach is to apply your own tapes. Use decal tape or order some violin tape:
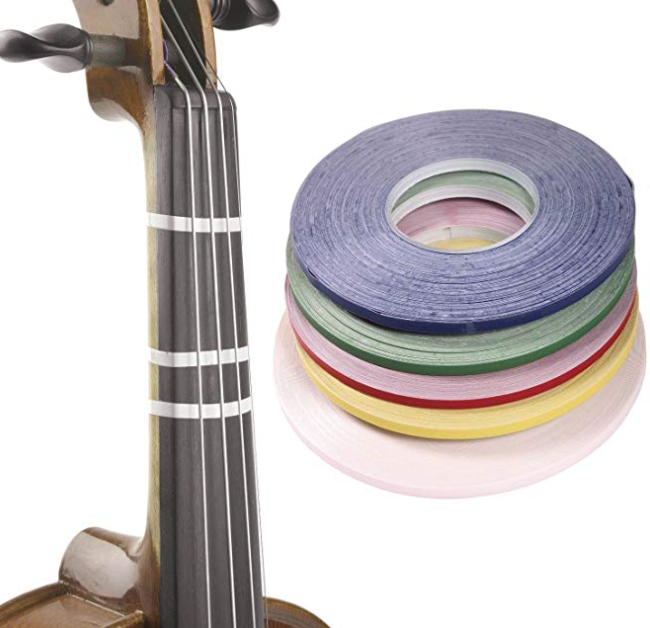
I’ll give instructions on how to place this tape for full size violins.
The quick version
- Place the first tape 36 mm from the nut.
- Place the second tape 68 mm from the nut.
- Place the second tape 82 mm from the nut.
The more step-by-step version
First, tune up your fiddle.
For a full size violin, you can place tape the first tape 36 mm from the nut. Use a ruler to find the right spot and a pencil to mark it and then place the tape. Before you fully press down the tape, use a tuner to test if the tape is in the right spot. If it’s in the right spot, then fold down the ends of the tape to cement it in place.
This is where your first finger will go on the D string. It is an E note.
Now, try to play that note with me to see if it’s in tune. If you’re still unsure, use a tuner.
We will place two more pieces of tape for the second and third fingers.
The second finger tape is placed 68 mm from the nut. On the D string this is F sharp. Now let’s test the second finger tape.
The third finger tape is placed 82 mm from the nut. On the D string this is G. Now let’s test the second finger tape.
When should I take off the violin finger tape?
Everyone’s different. Some people never use the tape, some keep it on until they’ve learned all the finger positions.
If you follow the FiddleHed course, I suggest taking off the second finger tape once you learn the second finger, taking off the first finger tape when you learn low first, and taking off the third when you learn raised third position.
Continue to practice with drone tracks and with your eyes closed. This will help you gain confidence in your own tuning.
Two ways I can help you level up your fiddling
- Sign up for the FiddleHed newsletter below, then get high-value tips and lessons delivered to your inbox.
- Sign up for the Free Two-week Trial. You’ll get full access to all courses and group lessons. Plus, I’ll send you some free lessons tailored to your current skill level.
[convertkit form=2850494]
Thanks for being here 🙏
Leave a Reply
You must be logged in to post a comment.
Thank you for the chords.